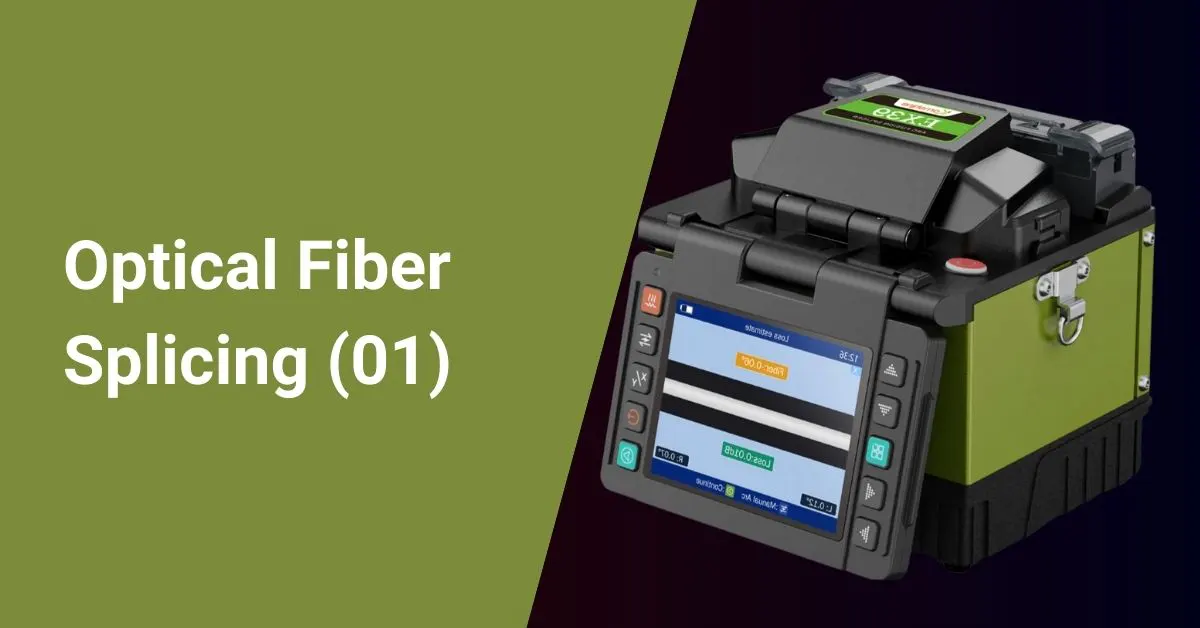
Do you know how fiber optic cables are joined together to transmit data over long distances? In this article, I will provide an insight into the fascinating process of optical fiber splicing. Fusion splicing is the primary method used to create permanent fiber optic connections. It involves aligning and heating the prepared fiber ends to thermally bond them together.
Let’s explore the key steps and techniques involved in fusion splicing through my experience in the field.
Table of Contents
Fusion Splice
Fusion splicing uses an electric arc generator to align and melt fiber ends. Two key factors make it ideal:
- Loss – It creates the tightest bond with light signal loss below 0.1 decibels (dB).
- Reliability – The microscopic fusion forms strong, transparent joints that last.
Below are highlights of common splice types:
| Splice Type | Loss (dB) | Strength |
|---|---|---|
| Fusion | <0.1 | Strongest |
| Mechanical | 0.2-0.5 | Weaker |
| Temporary | 0.5-1.0 | Weakest |
The Importance of ITU-T L12
The ITU-T L12 standard provides essential guidelines for achieving reliable optical fiber splices. Telecommunications networks can ensure consistent performance and interoperability by adhering to this standard.
Additional Considerations
- Fiber Type: The splicing process can vary slightly depending on the fiber type (single-mode, multimode, or specialty fiber).
- Splice Loss: Minimizing splice loss is crucial for optimal system performance. Factors affecting splice loss include fiber alignment, cleave quality, and arc conditions.
- Environmental Conditions: Temperature, humidity, and other environmental factors can impact splice reliability.
- Splice Equipment: The quality of the fusion splicer and other equipment used in the splicing process is essential for achieving consistent results.
Fusion Splicing Process
The process has five steps:
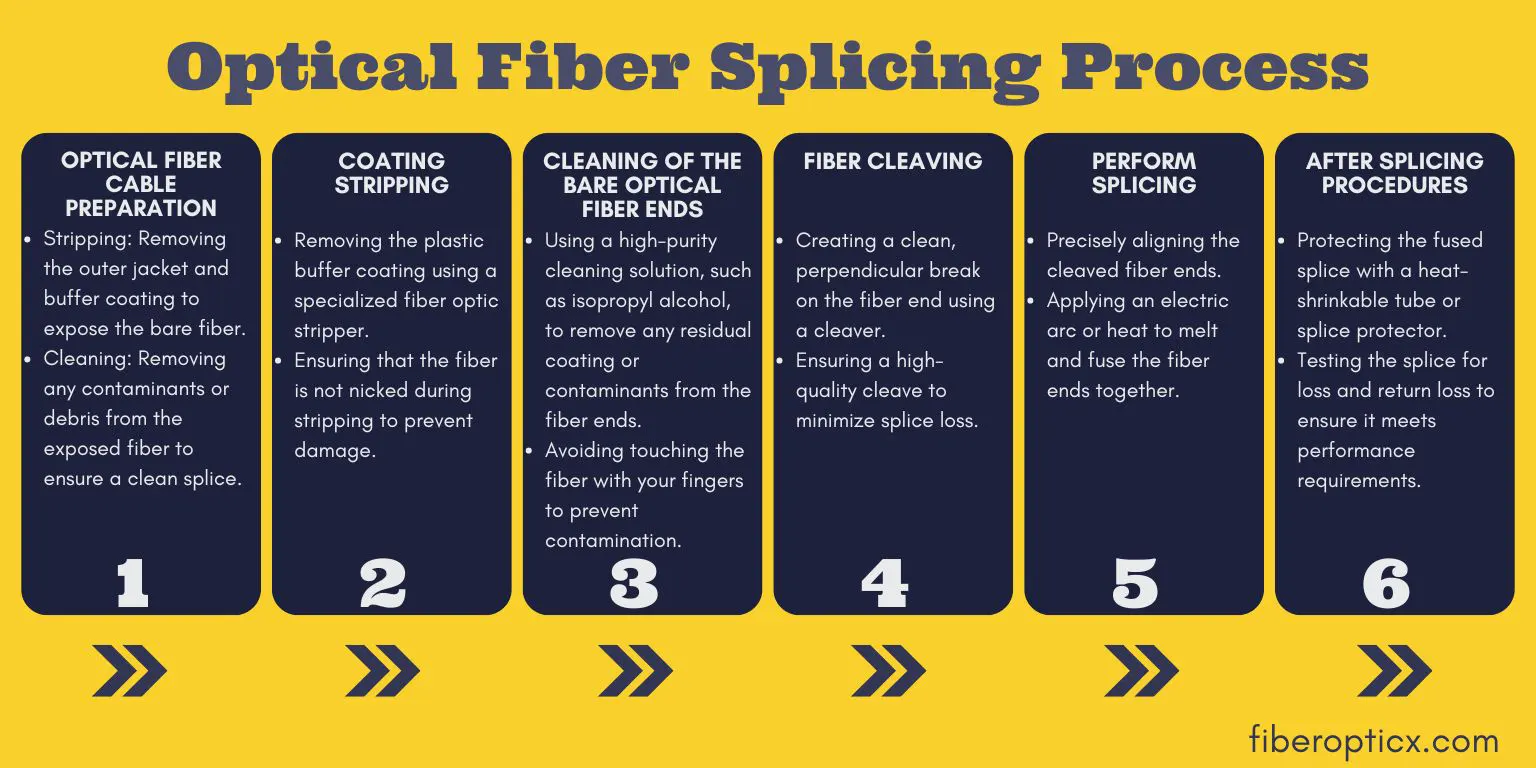
- Cable Preparation
- This strips the cable’s protective plastic and exposes the fibers for splicing. Specialized tools remove each layer without damaging the fibers.
- Fiber Cleaving
- A precision cleaver cuts the fibers at right angles for optimal bonding. Even minor angle errors increase loss.
- Fiber Alignment
- Automated clamps precisely place the cleaved fiber ends tip-to-tip under a microscope lens.
- Arc Melding
- An arc discharged between the aligned ends heats them just right for fusion without excess loss from over- or under-melting.
- Joint Cooling
- Letting the joint cool undisturbed prevents thermal stresses from cracking the delicate bond.
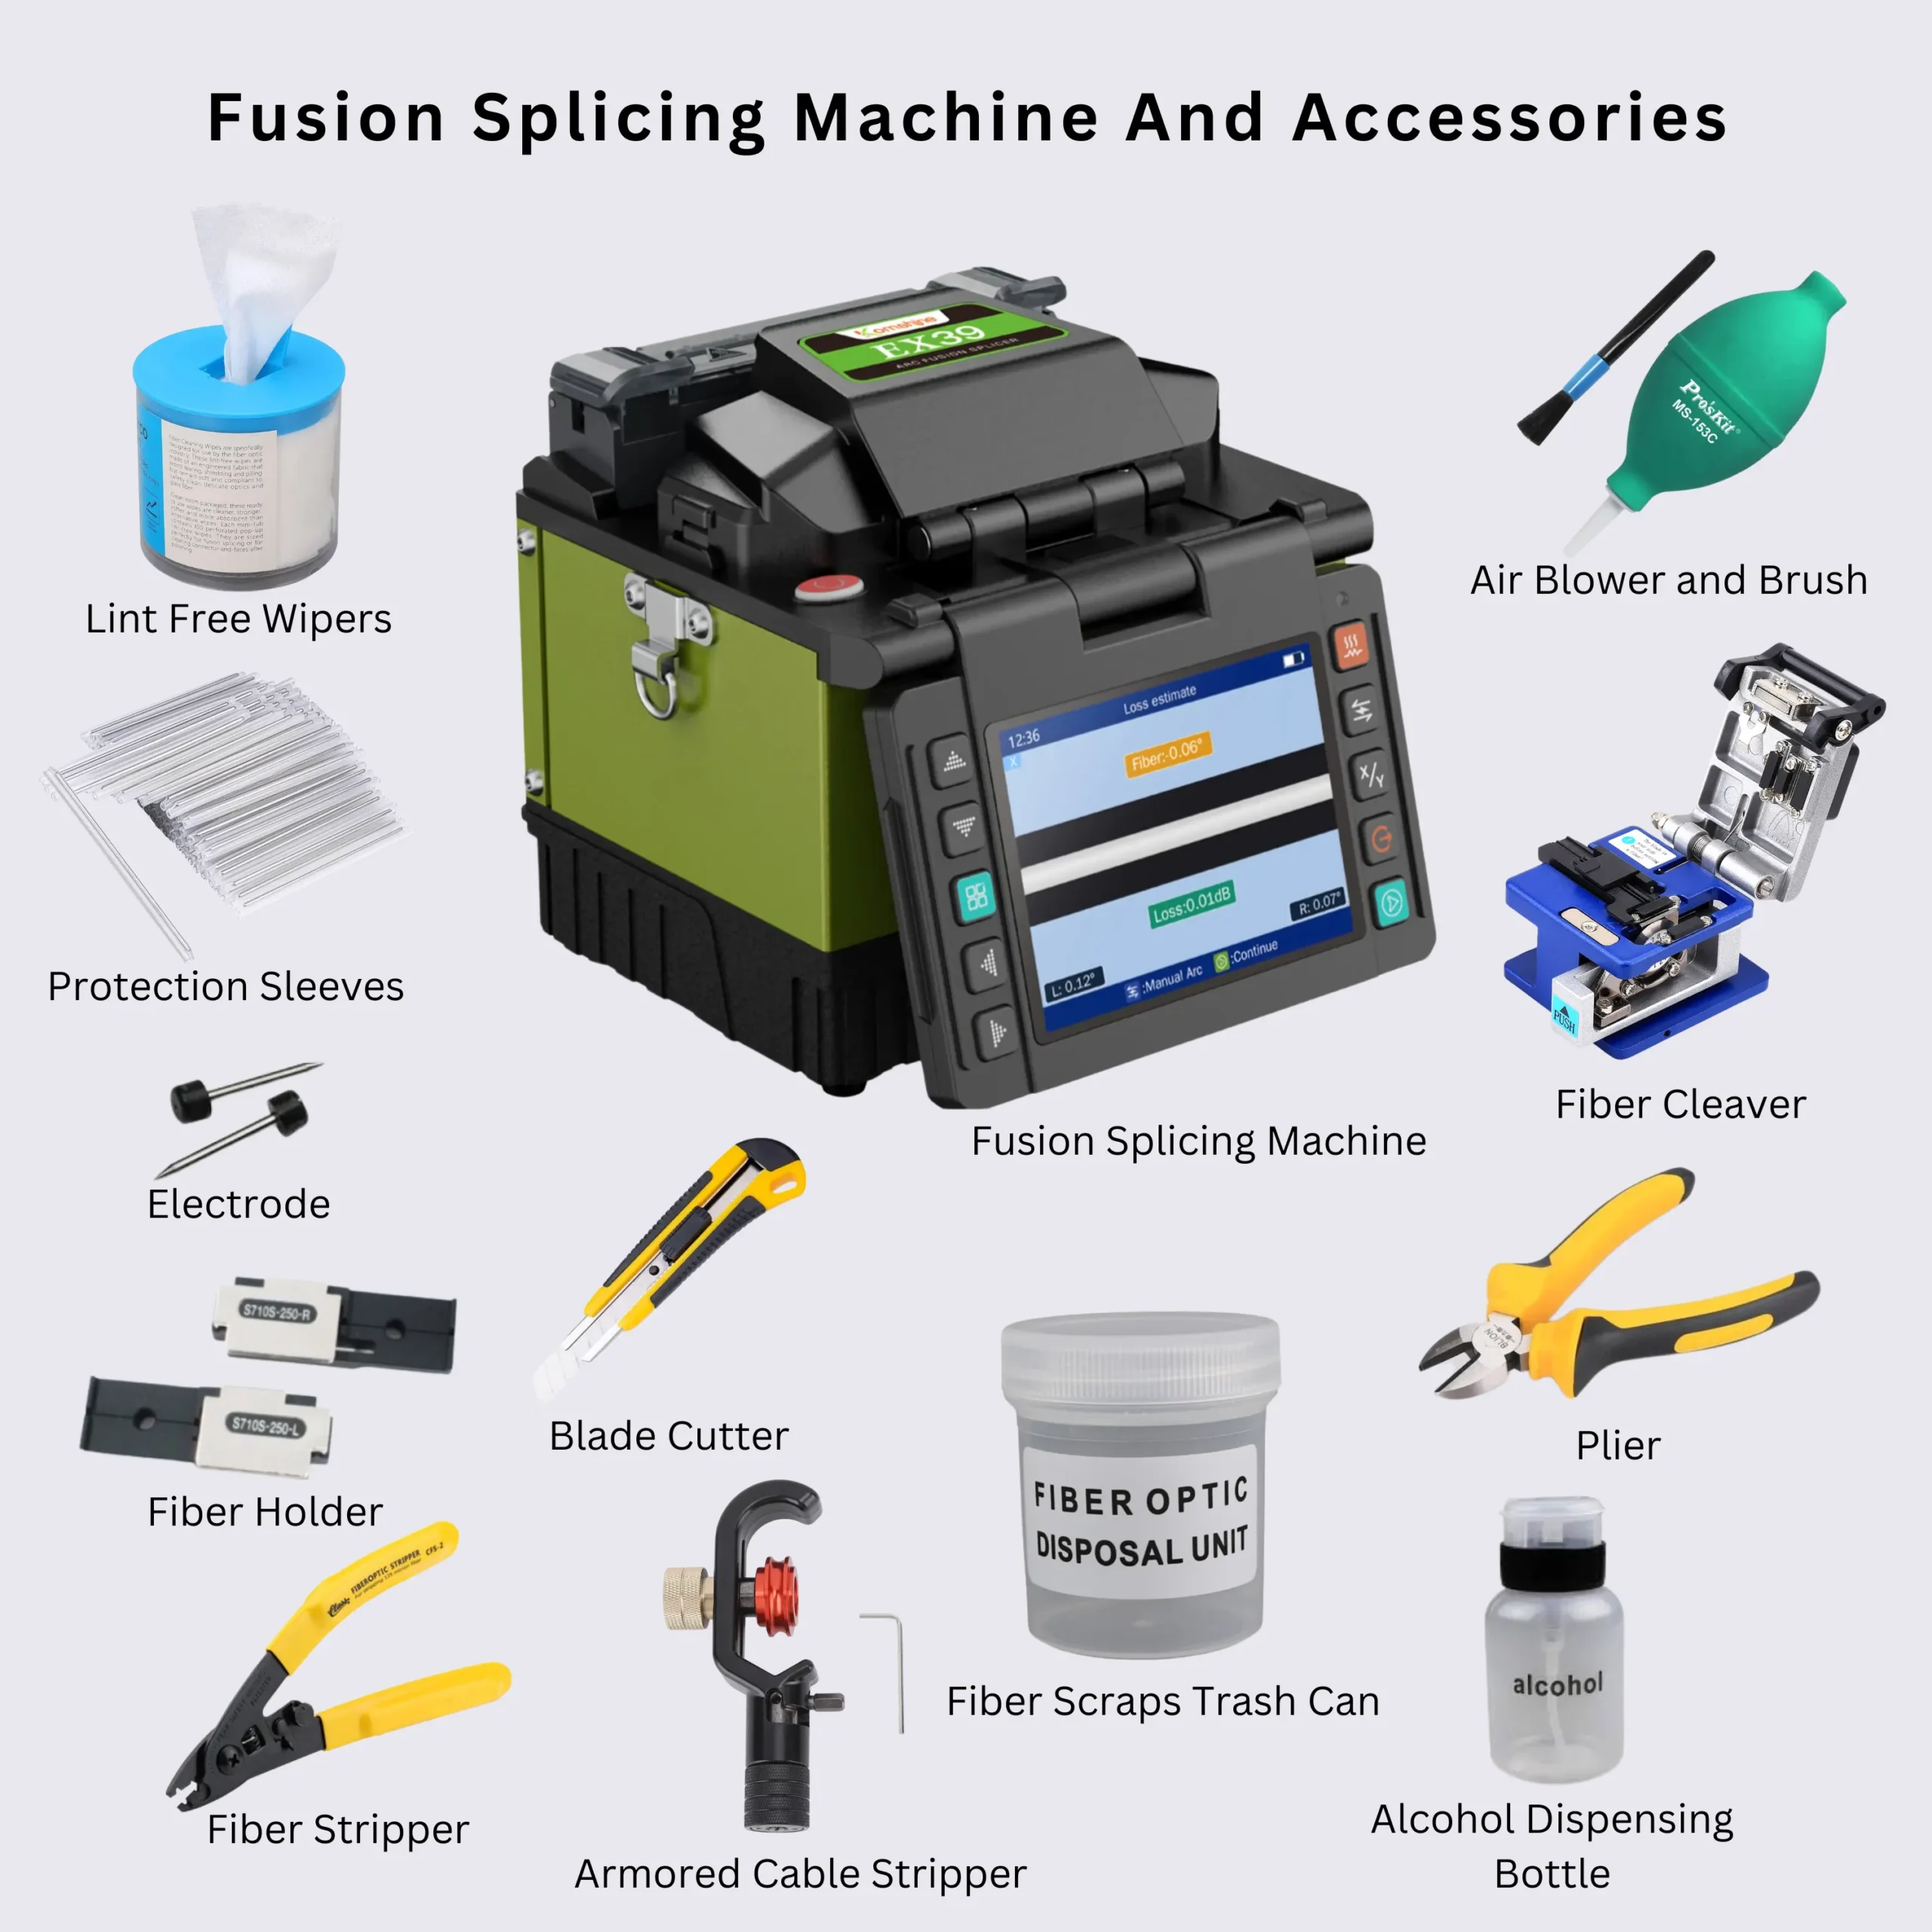
Key Components of a Fusion Splicer
- Fiber Clamps: Hold the fibers securely in alignment.
- Arc Discharge System: Generates the electric arc for melting the fibers.
- Microscope: Provides visual inspection of the fiber ends and alignment.
- Image Processing System: Analyzes the fiber images for precise alignment.
- Control Unit: Manages the entire splicing process.
Factors Affecting Splice Loss
The quality of a fusion splice directly impacts the overall performance of the fiber optic link. Several factors contribute to splice loss:
- Fiber Core Misalignment: Even slight misalignment can increase splice loss.
- Fiber End Quality: Imperfect cleaves or contaminants on the fiber ends can cause higher loss.
- Arc Conditions: Improper arc settings can result in incomplete fusion or excessive material loss.
- Fiber Type: Different fiber types (single-mode, multimode) have specific splicing requirements.
Advanced Fusion Splicing Techniques
- Active Alignment: Utilizes advanced imaging and control systems to achieve even higher precision in fiber alignment.
- Fiber Cleaver Integration: Some fusion splicers include built-in cleavers for a streamlined process.
- Automated Splicing: Advanced models can automatically perform the entire splicing process, reducing operator error.
Optical Fiber Cable End Preparation
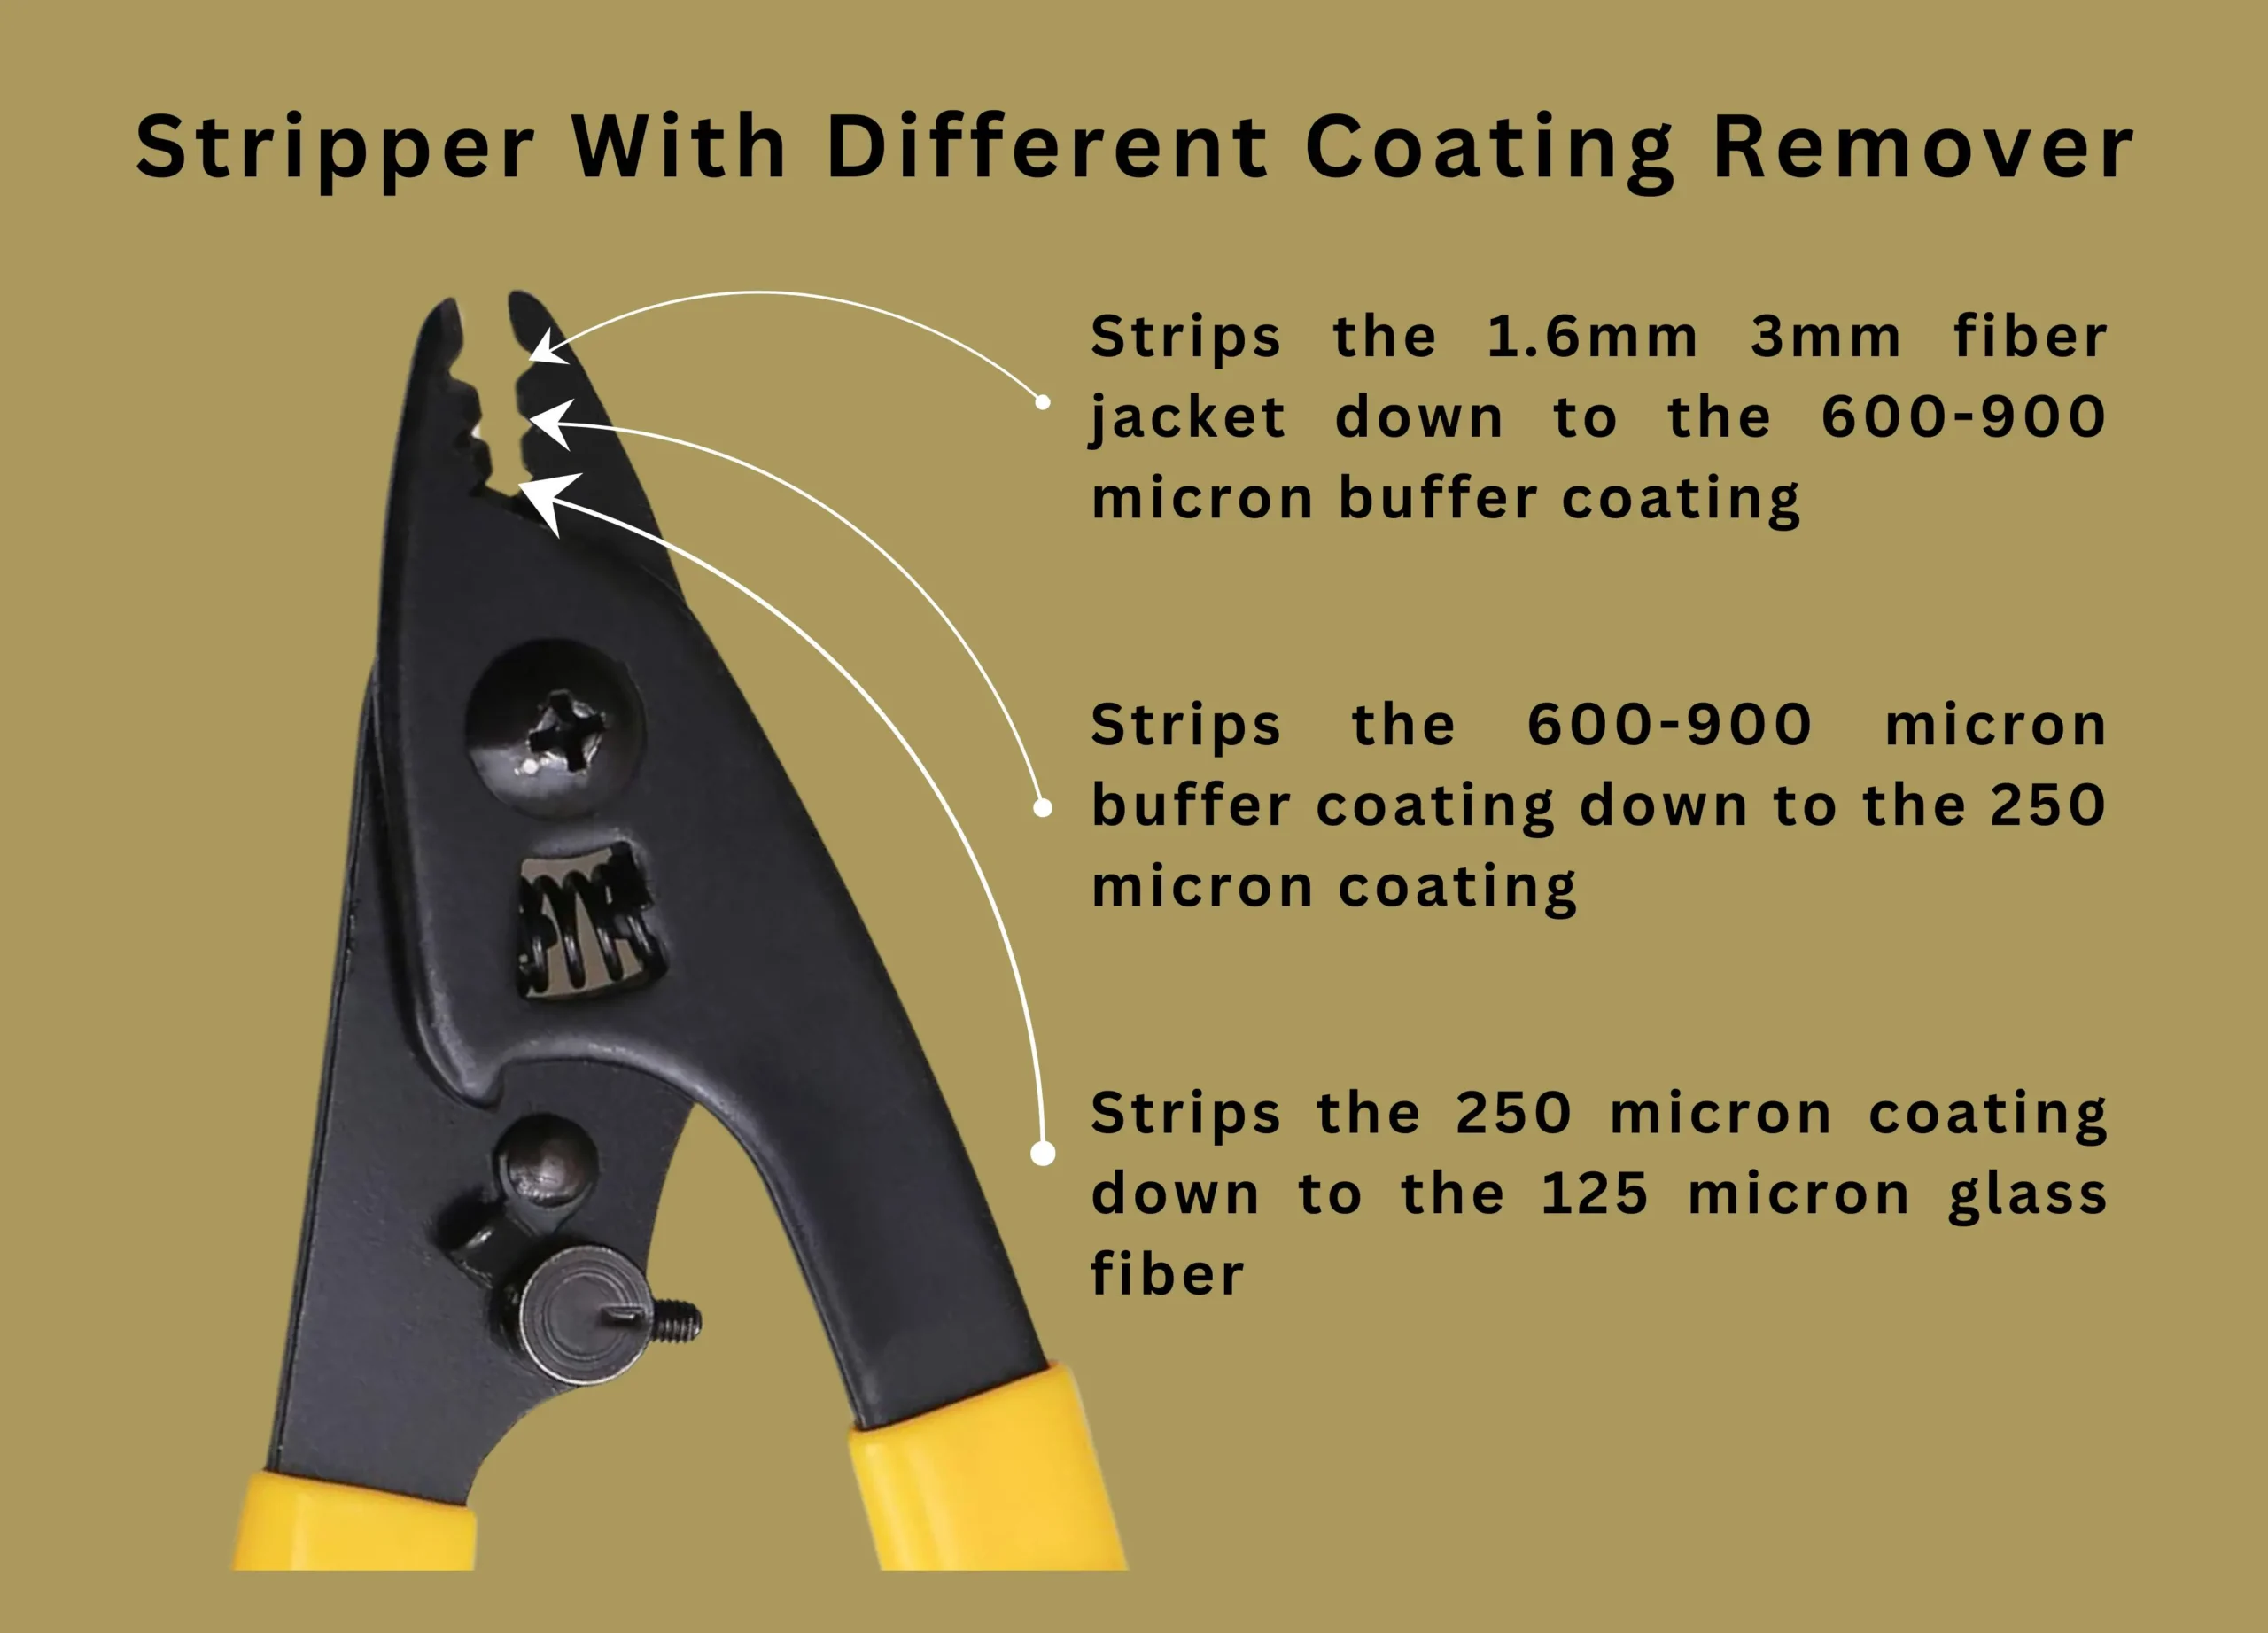
Preparing cable ends requires stripping layers back using the proper tools for each:
- Jacket/buffer strippers remove 2-3 meters of plastic coating.
- Fiber strippers expose an inch of the glass fiber.
- Cloth/wipes with alcohol clean contaminants to avoid future problems.
Key Points of Cable Preparation
- Thorough Cleaning: Removing contaminants from the cable is vital to prevent damage to the fiber during the splicing process and to ensure optimal splice performance.
- Tool Selection: The choice of tools depends on the cable type. It’s essential to use the appropriate tools for each component to avoid damaging the fibers.
- Strength Member Management: Preserving sufficient strength members is crucial for maintaining the cable’s integrity after splicing.
Additional Considerations
- Cable Type: Different cable types (loose tube, tight buffer, ribbon) require specific preparation techniques.
- Environmental Conditions: Working in harsh environments may necessitate additional precautions, such as using protective equipment or cleaning agents.
- Safety: Proper handling of tools and cables is essential to prevent injuries.
Common Challenges and Solutions
- Difficulty Stripping Tight Buffer Coatings: Using specialized stripping tools and techniques can help prevent damage to the fiber.
- Contamination: Using clean tools and working in a clean environment can minimize contamination.
- Incorrect Cleave Angle: Using a high-quality cleaver and following proper procedures can help achieve accurate cleaves.
Best Practices
- Cleanliness: Maintain a clean workspace and use clean tools.
- Tool Care: Regularly inspect and maintain tools to ensure optimal performance.
- Practice: Consistent practice can improve cable preparation skills.
Thorough cleaning between steps prevents debris from interfering with tight core alignment and low-loss fusion.
Pro tip: Always leave enough strength members to properly secure the cable in the closure!
Coating Stripping
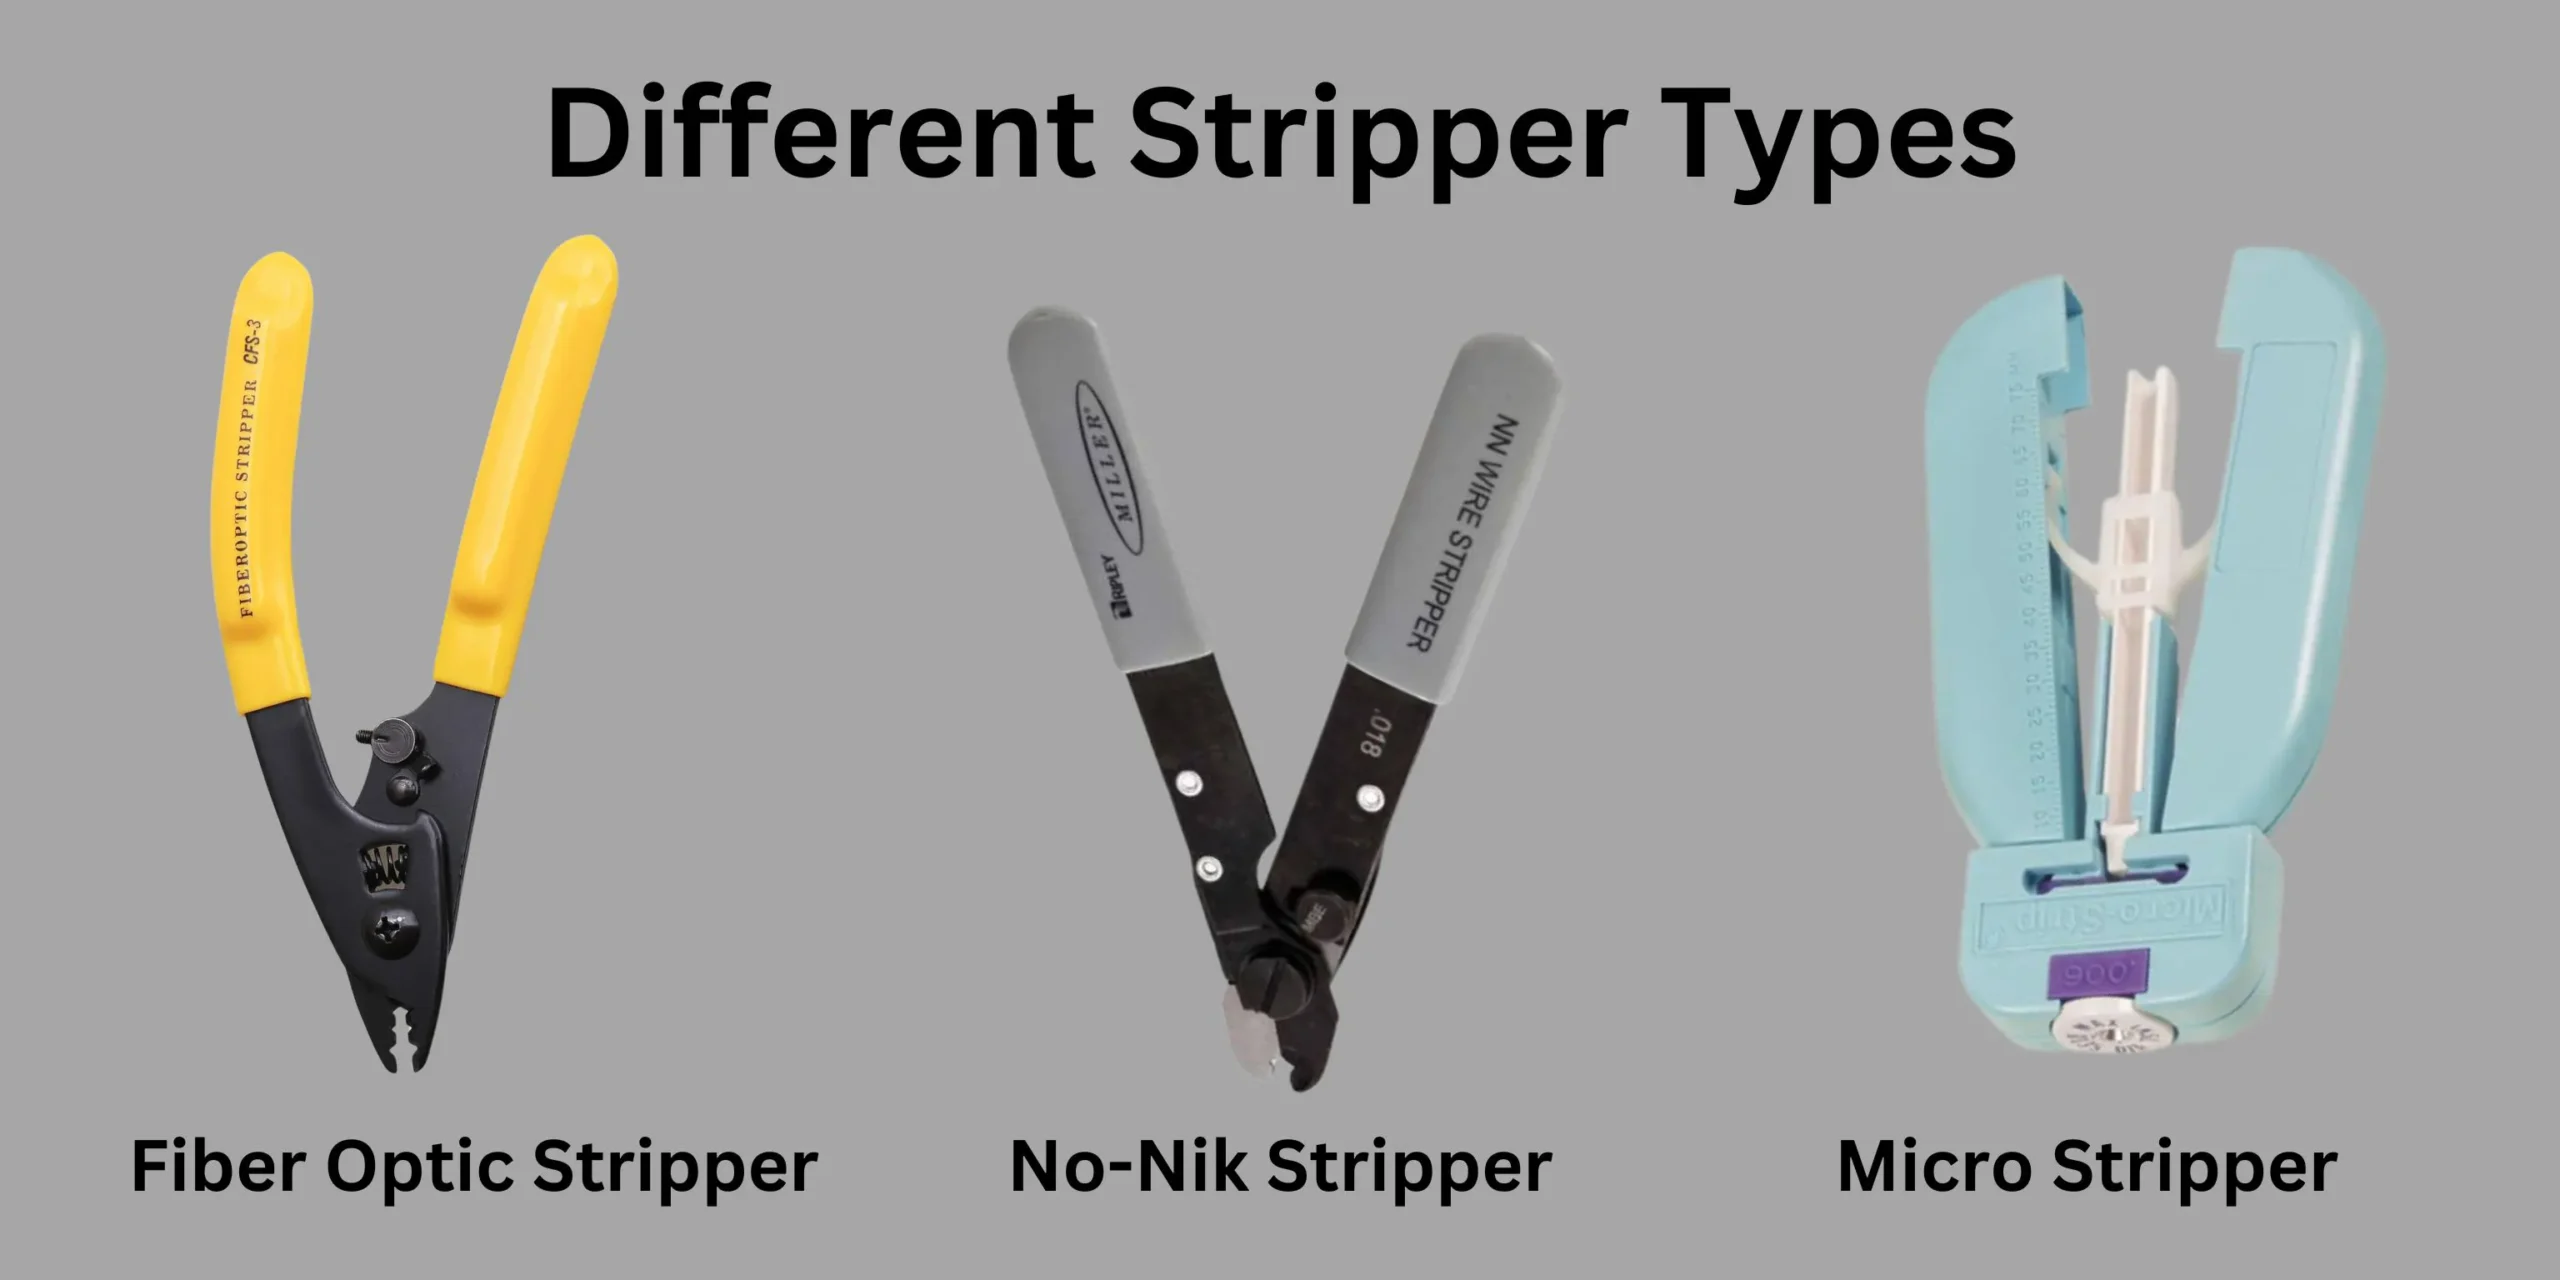
There are multiple coating layers protecting the fiber that must be removed. Specialized strippers simplify this process.
- Stripper Types: The three primary types of strippers (fiber optic, No-Nik, and micro) are designed for specific coating thicknesses.
- Coating Removal: Strippers are typically sized to remove specific coating layers, such as the jacket, buffer, and primary coating.
- Fiber Protection: Avoiding nicks during stripping is crucial to prevent fiber failure.
- Stripper Maintenance: Regular cleaning and replacement of damaged strippers are essential for optimal performance.
Different stripper types target specific layers:
| Stripper | Purpose | Blade Type | Usage |
|---|---|---|---|
| Fiber optic | Removes outer jacket and buffer coatings | Variety of blades for different cable types | General-purpose stripping |
| No-Nik | Removes buffer coating without nicking fiber | Specialized blade for clean cuts | Precise buffer removal |
| Micro | Removes buffer coating with precision | Smaller, precise blade for delicate work | Delicate stripping operations |
No-Nik strippers gently remove buffer coatings without damaging the fiber below. Micro-strippers separately take off each layer to finely control the stripped length.
Considerations When selecting Stripper
- Fiber Type: Different fiber types may have varying coating thicknesses and materials, requiring specific strippers.
- Stripping Length: The required stripping length depends on the splicing technique and the type of splice protector used.
- Cleanliness: It’s essential to keep the stripper and the work area clean to prevent fiber contamination.
Remember: Nicking the fiber during stripping is a big no-no. It can cause tiny cracks that might lead to fiber failure down the road.
Potential Issues and Solutions
- Fiber Damage: Using the correct stripper and applying gentle pressure can help prevent fiber damage.
- Inconsistent Stripping: Ensuring that the stripper is properly aligned and maintained can help achieve consistent results.
- Coating Residue: Thorough cleaning of the fiber after stripping can remove any residual coating material.
Best Practices
- Choose the Right Stripper: Select the appropriate stripper for the fiber type and coating thickness.
- Handle with Care: Use gentle pressure and avoid twisting the fiber during stripping.
- Inspect the Fiber: Examine the fiber for any damage after stripping.
- Clean the Stripper: Regularly clean the stripper to remove debris.
Cleaning Of The Bare Fiber Ends
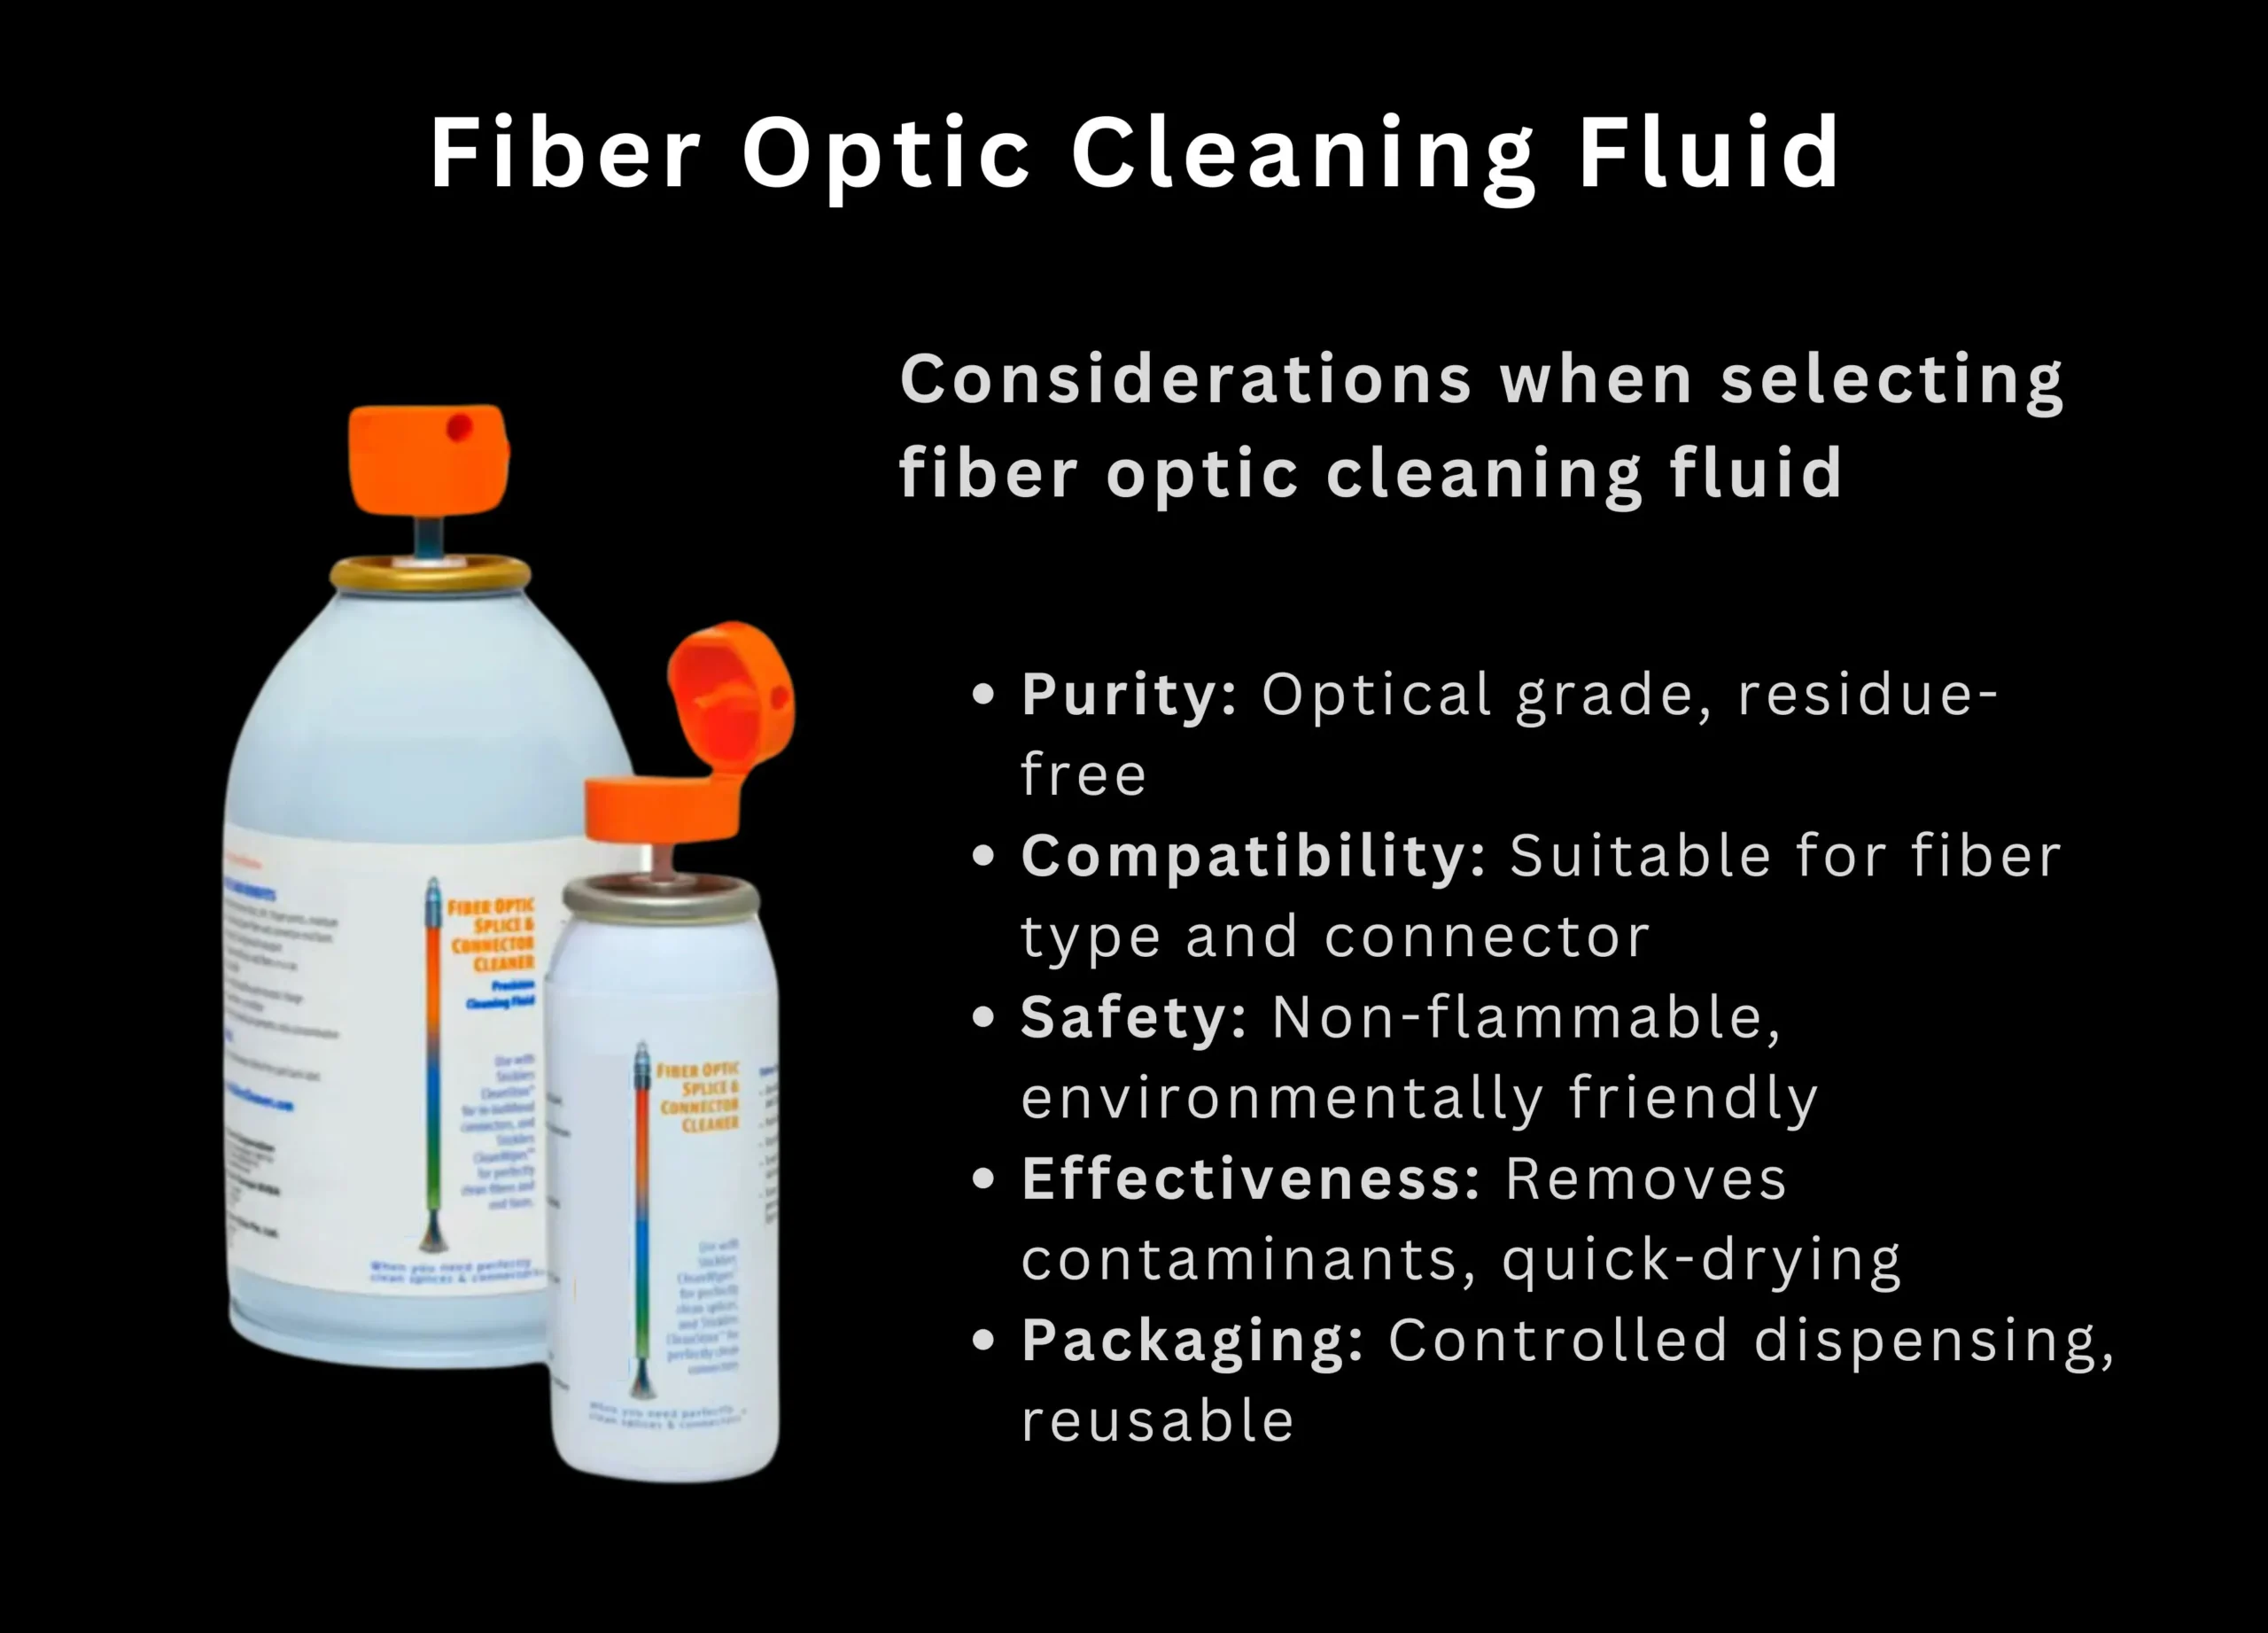
Even microscopic debris left on the stripped fiber interferes with the fusion. A two-step cleaning is best:
- Isopropyl alcohol on lint-free cloth removes coating residuals.
- A dry wipe finishes the preparation. Inspect fibers under a microscope lens – any specks still visible require re-cleaning.
Avoid touching fibers with your hands. Work with gloves on if necessary due to solvents. Maintain a neat workspace also keeps fibers debris-free.
Cleaning Procedure
- Choose a clean environment: Avoid dusty areas to minimize contamination.
- Select the appropriate cleaning method: Consider the level of contamination and the fiber type.
- Apply the cleaning solution: Use a gentle, circular motion to remove debris.
- Dry the fiber: Use a dry swab or air to remove any residual alcohol.
- Inspect the fiber: Examine the fiber under magnification to ensure it’s clean.
Additional Considerations When Cleaning
- Cleaning Solution: Using a high-purity cleaning solution is essential to avoid leaving residues.
- Swab or Wipe Quality: Lint-free materials are crucial to prevent fiber damage.
- Handling: Avoid touching the fiber with your fingers to prevent contamination.
Re-cleaning: If necessary, repeat the cleaning process until the fiber is completely clean.
Conclusion
By correctly preparing cables, stripping coatings and deeply cleaning fibers, fusion splicing creates low-loss joints between cables over vast distances. Consistently achieving losses under 0.1 dB is possible by strictly following standards and using preferred tools and practices outlined here. Proper splicing enables robust data transmission in telecommunications networks globally.
FAQ
How to prepare fiber for splicing?
Fiber preparation involves several steps: stripping the outer jacket, removing buffer tubes, cleaning the bare fiber ends, and cleaving the fiber to create a clean, perpendicular surface.
How do you clean fiber when splicing?
Fiber ends should be cleaned with a high-purity cleaning solution, such as isopropyl alcohol, using lint-free swabs or wipes. Avoid touching the fiber with your fingers to prevent contamination.
What are the best practices for fiber cleaning?
Best practices include using high-purity cleaning solutions, avoiding excessive wiping, working in a clean environment, and inspecting the fiber for cleanliness after cleaning.
Which solution is used for cleaning fiber?
Isopropyl alcohol (IPA) is a commonly used cleaning solution for fiber optic components.
How do you clean fiber material?
The same cleaning methods used for fiber ends can be applied to other fiber materials, such as connectors and splices.


